Tuesday 29 April 2014

Pretty Pink Posh Sequin Shaker Blog Hop

There is a big blog hop going on at the Pretty Pink Posh blog here http://prettypinkposh.com/2014/04/sequin-shaker-blog-hop.html where there are lots of wonderful shaker cards to admire.

 
I decided to join in, so I made this undersea scene, viewed through a porthole! I have had the porthole stamp for ages, but can't remember which company made it - sorry! I started with an A5 silver shimmer card blank and added a layer of PTI Hawaiian Shores card.


I took some pearl shimmer card and stamped the porthole using Memento Gray Flannel dye ink. I then cut out the centre circle using a Spellbinders standard circle die. I taped some thick acetate which I had saved from old Spellbinders packaging to the back of the aperture. The sentiment is from a set by Hobby Art Ltd and was stamped using the same Gray Flannel dye ink on  to PTI Aqua Mist card, which had been die cut using one of the Spellbinders Labels eight dies (S5 - 019). This was then layered onto a PTI Hawaiian Shores die cut from the Spellbinders Decorative Labels Eight dies (S5 - 148). I embellished the sentiment panel with a couple of brads which look like screws.


I decided to use a square of PTI Sea Shimmer card to make the undersea view. I drew a feint circle (slightly larger than the size of my acetate window) to aid in placing the stamps. I used a selection of Elusive Images stamps from the following stamp sets :- Underwater Kingdom - UA5SP0326, Seadragon - UA5SP0327, Mermaid Queen - UA5SP0328 and Something Fishy - UDLSP0330. These are currently available from Chocolate Baroque here  http://www.chocolatebaroque.com/search.asp?keyword=mermaid . They were stamped with a mixture of Gray Flannel and Tuxedo Black Memento dye inks. I also stamped most of the images onto some masking paper and fussy cut them out, so that I could mask off the images in the foreground whilst building up my scene. The panel was then coloured with Copic Ciao marker pens and the fish were accentuated using a Wink Of Stella Clear glitter pen.


Then it was time to add some pretty blue and green assorted sequins. I used 3mm thick foam tape on the back of the porthole panel to raise it up enough for the sequins to be able to fit inside. I snipped the tape at intervals so that I could bend it around the circular aperture and I made sure that it completely met up and that there were no gaps. A few more foam pads kept the panel flat and made it easy to fix to the card front.


Here is a close up of the sentiment panel. I thought that the words were quite appropriate to describe the various coloured sequins in my "ocean".


Finally, here is a close up of my undersea scene, complete with mermaids and brightly coloured fish. As usual you may click on any of the photos to enlarge them for a better view.


This card was so much fun to make - I hope you like it!

Sunday 20 April 2014

Hoppy Easter and Cure for the Monday Blues Challenge # 13 (Hoppy Eggstravaganza)!

Happy Easter to you all - I hope that you're having a lovely time and have plenty of chocolate eggs!

This is my second post today - please scroll down to view my entry for the Indigo Blue Spring Flowers challenge.

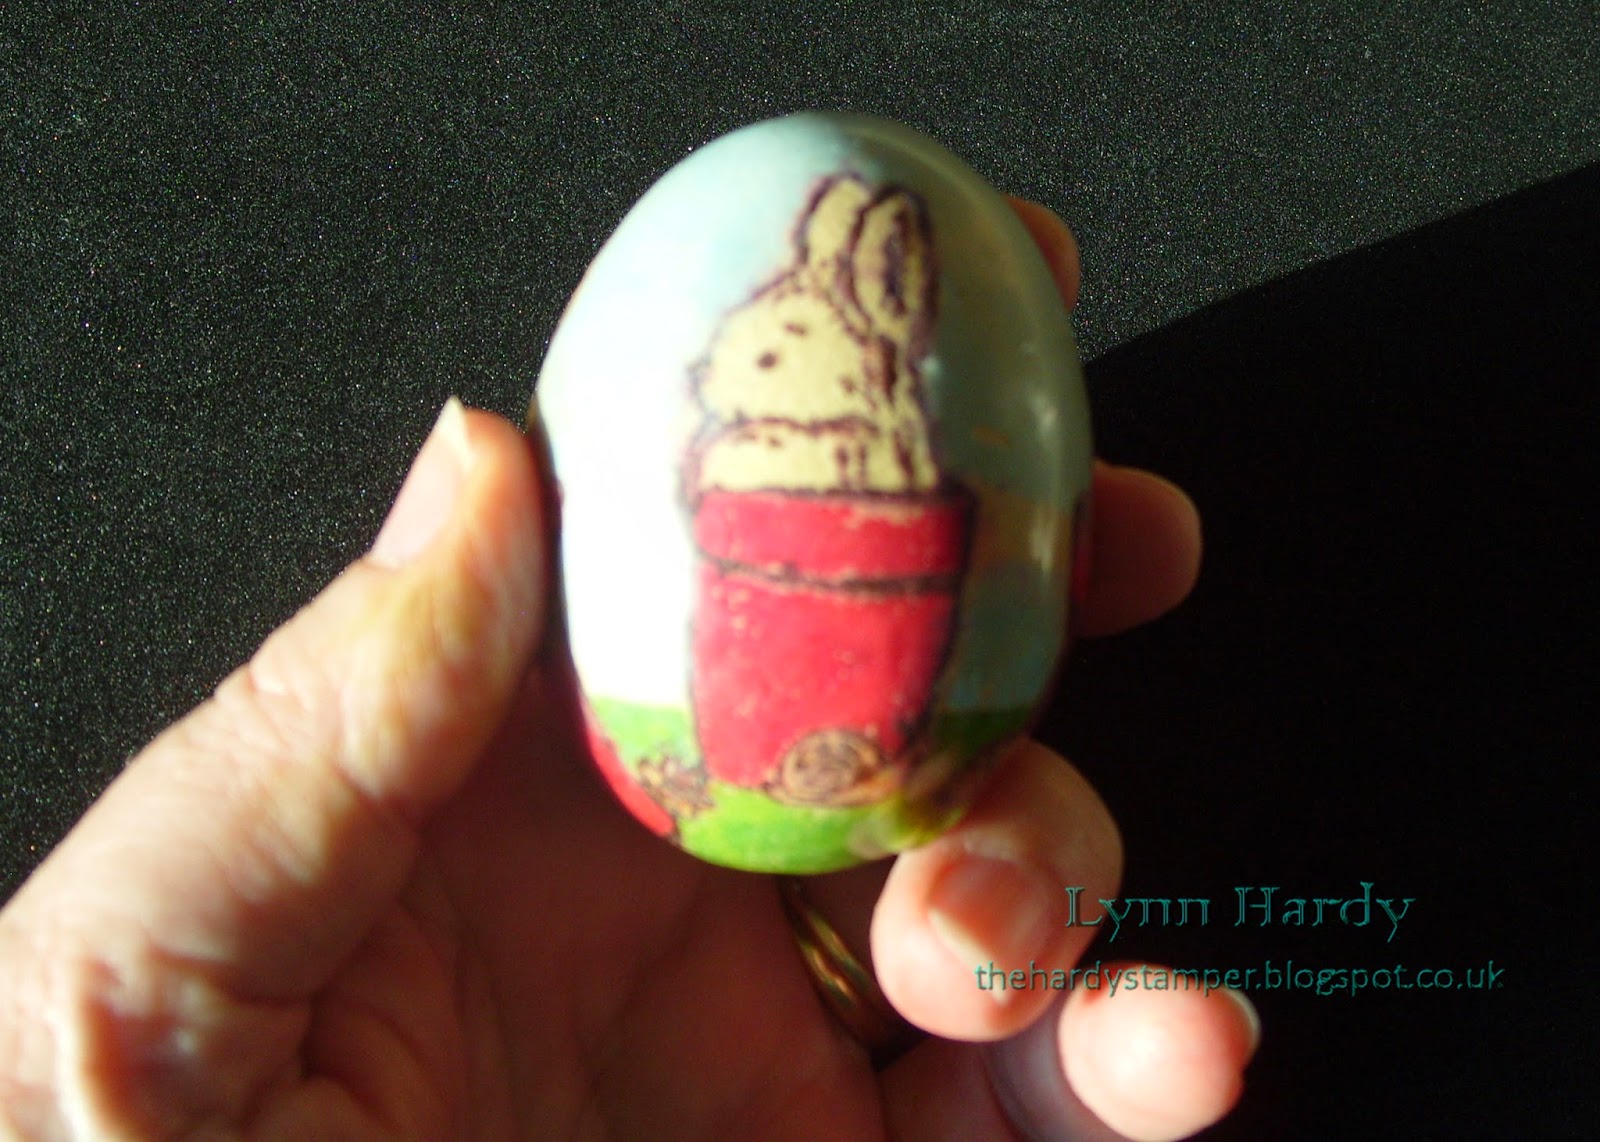
I thought that I would start by showing you an Easter egg that I decorated several years ago, shortly after I first started stamping. I wanted to decorate an actual egg, so I started by pricking a small hole in the top and bottom of an egg so that I could empty it by blowing the contents into a bowl. You can just make out the small hole in the top of the egg in the first photo.

 
The second photo shows the hole in the bottom of the egg, which was slightly larger to allow the contents to be removed. Please excuse the quality of the photos as the sun was reflecting off the surface of the egg.
 
 
Once the egg was empty and I had washed it out and dried it, I was able to stamp four cute bunny images from a Penny Black stamp onto the eggshell. This is the back of the egg, with the little bunny hiding in a flowerpot. I coloured the egg using a combination of inkpads and markers.

 
This is the left side of the egg.

 
And here is the other side.

 
 The front, showing a very surprised looking bunny! Once the inks had thoroughly dried I coated the whole thing with versamark ink and covered it with clear embossing powder. I held the egg by putting a skewer into the hole in the bottom, then carefully heated the embossing powder until it had all melted. I repeated this until I had a clear protective coating all over the egg. It was difficult to get it smooth underneath as I had to handle it with care whilst it was hot and try not to drop and break it!

 
Considering that I hadn't been stamping very long, I was pleased with the results. If I was to do this again, I don't think I'd use embossing powder, but rather use a clear spray varnish or some Glossy Accents.  
 
 
Now on to this week's Cure For The Monday Blues challenge on Taheerah Atchia's blog here - http://littlemisst-papercraft.blogspot.com/2014/04/cure-for-monday-blues-challenge-13.html . The inspiration photo this week shows an Easter table set with lots of white bunnies and neon eggs.

Source: Pinterest
 
I started with a 4" x 6" white card blank and decided to dry emboss the front of it using a Spellbinders M-Bossabilities Lovely Lattice embossing folder (Side A, ES - 009), to mimic the embroidered pattern on the white tablecloth in the inspiration photo above. I found the perfect bunny stamp to use on the Waltzingmouse L'il Buddies stamp set http://www.waltzingmousestamps.com/products/lil-buddies and the sentiment was also from the same set. I used some green and white bakers twine at the top of my card, imitating the stripey drinking straws in the photo.
 
I used the smallest of the Spellbinders egg dies to cut some bright pink and green eggs, which I stuck in a row on the bottom of the card. They fitted perfectly inside the diamond shapes on the background!

Click on photo to enlarge.
 
I needed something to make my white bunny stand out against the white card background so, using the stripey bottles in the photo as a guide, I stuck four stripes of white, pale pink, neon pink and bright yellow card to a scrap of white card then die cut an egg shape from it with a larger Spellbinders egg die. This was added to the card front with foam pads for dimension.


I stamped the little bunny onto white card three times, coloured his inner ears and nose pale pink with a Copic Ciao marker and cut out the stamped images. I added a neon pink bow and decoupaged the bunny onto the stripey egg with foam pads. You can see the extra dimension that this gave in the photo below.


The final touch was a pink carnation from Wild Orchid and four small leaves from a Spellbinders tiny foliage die set, which I added to the base of the egg shape as a nod to the vase of pink carnations in the inspiration photo.
 
This card was so much fun to make and I can't wait to see what Taheerah has planned for next week!
 
I would also like to enter this card into the Cupcake Inspirations challenge # 257 where the theme this week is "Bunnies".
 
 
Thanks for looking!

Indigo Blu Challenge # 14 - Spring Flowers

The current challenge on the Indigo Blu blog is to make something using some of the lovely Indigo Blu stamps with the theme of spring flowers - check it out here http://indigoblublogchallenge.blogspot.co.uk/2014/03/challenge-14-spring-blossoms.html

I decided to use the beautiful Anemone Corner stamp (AC 1) together with the sentiment from the Poppy Meadow set (PM 1) to make this pretty spring themed card.


Click on the photo for an enlarged view.
 
I started with a five and a half inch square lavender coloured card blank and added a layer of purple card and then pale green card. I used Memento Pistachio dye ink to stamp the Anemone corner onto smooth white card and trimmed it to fit. The sentiment was stamped with Memento Grape Jelly dye ink. I die cut three of the small Spellbinders lattice corners from purple card and attached them to the front of my card with a small amount of Ranger's Glossy Accents.
 
The three anemone flowers were coloured with Copic Ciao markers - I used BV00, BV02, RV29, V17 & V09. I stamped them again onto smooth white card, coloured them in to match those on the card front and fussy cut them out. I moulded the petals into shape by wrapping them around the handle of a small paintbrush then I stuck the flowers to the card with silicone, so that they would hold their shape. You can see the flowers in more detail in the photo below.


I am very pleased with the finished card and will be sending it to one of my friends who has a birthday later this week. 

Monday 14 April 2014

Papertrey Ink Make It Monday # 159: No-Sew Quilted Cards (Part 3).

This is the final part of my PTI challenge #159 entry for today.

My final card is a smaller 4" x 6" white card blank with the coloured paper squares added directly to the front of the card. Again I used Scarlet Jewel ribbon and matching card to die cut the word "Love"which was adhered with Ranger Glossy Accents. The "with" sentiment from the co-ordinating "Wonderful Words Love" stamp set was added with matching Scarlet Jewel ink.
I really enjoyed making these cards and would certainly use this method again - although I would be tempted to try adding some faux stitching to the patchwork background next time. Thanks for looking.

Papertrey Ink Make it Monday # 159: No-Sew quilted cards (Part 2).

Welcome back to part two of my entries for the PTI Make It Monday challenge # 159!


Here my third card also used a 6" square kraft card blank and a slightly smaller square of the same kraft card. I added the patchwork paper squares as before and embossed the panel using the "Happy Hexagons" cover plate. I selected Scarlet Jewel ribbon and matching card to die cut a fancy label with the Boutique Borders Birthday die. The fancy flourishes and Thank You sentiment from the matching stamp set were stamped with Versamark ink and heat embossed using Zing "Blush" embossing powder. Once again the sentiment panel was added to the card front with foam pads.
 
Please see the next post for my final card in this series.

Papertrey Ink Make It Monday # 159: No-Sew Quilted Cards (Part 1).

Last week over on the Papertrey Ink blog http://nicholeheady.typepad.com/capture_the_moment/2014/04/make-it-monday-159-no-sew-quilted-cards.html Dawn McVey showed how to make faux quilted cards by forming a patchwork effect with squares of patterned paper and embossing using Texture plates. This technique looked like a lot of fun so I decided to play along today and I ended up making four different cards. I started out by cutting a selection of Papertrey Ink patterned papers into 1.5" squares.


As usual you may click on any of the photos to see the cards in more detail. 
 
For my first card I used a 6" square kraft card blank and stuck some of the patterned paper squares onto another square of kraft card using double sided tape. I then embossed the patchwork panel in my Grand Calibur using the "In Bloom" cover plate. I took a length of Simply Chartreuse dotty ribbon and used it to cover the join where I'd had to use the cover plate twice. The panel was stuck to the card blank with double sided tape and I stamped the "make the world beautiful" sentiment (from the "Wonderful Words Friends stamp set) below in black dye ink. Finally I die cut the corresponding "Friends" word die with a scrap of Simply Chartreuse card and stuck it just above the ribbon line using Ranger Glossy Accents.  


My second card uses similar coloured patterned papers and a 5" x 7" white card blank. This time I stuck the paper squares directly to the card front, then embossed it with the "Happy Hexagons" cover plate.  I used some Simply Chartreuse plain satin ribbon and a fancy label shape diecut from matching card, then used black dye ink to stamp the two flourishes and the Birthday Sentiment from the "Boutique Borders Birthday" stamp set. The sentiment panel was added to the card with foam pads to give some dimension.
 
Please see my next post for details of my other cards (I needed to do seperate posts in order to be able to link up to the challenge on the Papertrey Ink blog).


Saturday 12 April 2014

Newton's Nook Inky Paws Challenge #8

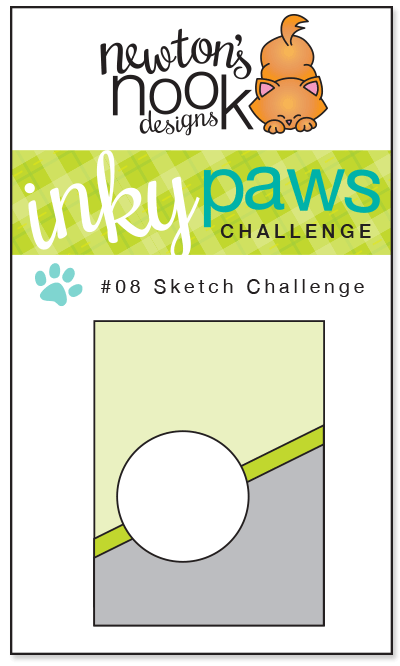
Firstly I must say a huge thank you to Jennifer at Newton's Nook, as I was chosen as one of the lucky winners in their March release blog hop and was sent the lovely "Basket of Wishes" stamp set. I discovered that they were running a sketch challenge on their blog here http://www.newtonsnookblog.com/2014/03/inky-paws-challenge-8-sketch-challenge.html  and I decided to enter three cards, all using the new stamps that they kindly sent me.
 
Here is the sketch provided for challenge #8.
 
My first card uses the cute Easter basket, with Newton the cat snuggled up amongst eggs and a little bunny. I stamped the images (the basket bases and tops are all separate stamps, giving dozens of possible variations) and sentiment using Memento Tuxedo Black ink onto a circle die cut with one of the Spellbinders eyelet circle dies. I coloured the image with Copic Ciao markers and layered it onto a pink card circle which I'd cut using a Spellbinders lacey circle die.

 
 I cut some lemon yellow and Aruba blue Core'dinations card into rectangles slightly smaller than my 5" x 7" white card blank, then sliced them diagonally. I took one piece of each colour and embossed them both with a Darice embossing folder, sanded them to reveal the paler core and mounted them to the card with double sided tape. I covered the seam with a length of pretty striped ribbon and added the stamped panel using foam pads.


My second card uses a similar card blank and the remaining two pieces of  Core'dinations card, but this time I embossed the blue portion with musical notes and the yellow portion with pretty flowers. Two narrow strips of the same card were used as the diagonal "ribbon" - all added with double sided tape.
 
The basket of flowers, little bird and musical notes were all stamped using Memento Rich Cocoa dye ink onto a circle of white card which I'd cut using a Spellbinders teardrop die. Again the images were coloured using Copic Ciao markers and then added to the card with foam pads.
 
 
My final card uses a smaller, 4" x 6" cream card blank, a layer of Papertrey ink "Ocean Tides" card and two pretty, muted patterned papers from Docrafts Papermania "Home to Nest" collection. Where the papers joined I covered the seam with a length of Walnut seam binding and added a small bow. The gardening basket and sentiment were stamped onto a circle of cream card using Memento Tuxedo Black dye ink and again I coloured the image with Copic Ciao markers - this time using more subtle colours. I also stamped the top part of the basket onto a scrap of the Ocean Tides card and fussy cut the pair of gardening gloves, sticking them to the card with a dab of glossy accents. 

 
As the Newton's Nook stamps are made from clear photopolymer I was able to slightly bend the sentiment so that it curved around the top of the cream circle. I added a scalloped layer of the Ocean Tides card, cut with another Spellbinders die and used foam pads to mount the panel onto my card. I think that this one would be suitable to give to a man as the colour scheme is quite muted.
 
I really enjoyed playing with my new stamps! There are two more basket filler images and several sentiments that I haven't used here, so I shall be making some more of these cute cards in the near future. Thanks again to Newton's Nook and thanks for looking!

Monday 7 April 2014

Papertrey Ink Make It Monday #158: Stamping With Watercolor Mediums.

Last week on the Papertrey ink blog   http://nicholeheady.typepad.com/capture_the_moment/make-it-monday/  Heather Nichols did a video showing how to use different mediums like Faber Castell Gelatos to stamp and obtain pretty watercolour effects.
 
I had been lucky enough to get some Gelatos for a Christmas gift last year and hadn't tried them out, so this seemed like the ideal opportunity! I needed to make two Sympathy cards, so I selected the beautiful Meadow Greens stamp set, two white 6" x 4" card blanks, some Bockingford 140lb watercolour paper and some Simply Chartreuse and Plum Pudding coloured card.
 
I started by lightly misting the watercolour paper with water, then added a very small amount of Cotton Candy Gelato and used a brush to fade it out as a background wash. Then I applied Grape Gelato directly to the flower head stamp and misted it with water before stamping onto one of the cards. I reapplied the Grape Gelato to the stamp and this time tried brushing over it with a waterbrush before stamping onto the other card. I switched to Pistachio Gelato and continued in the same way, stamping the flower head stalks, the stems and then the leaves (to which I also added a little Green Tea Gelato for shading). When the paper had dried I stamped the sentiment using black dye ink - as you can see from the photo below I tried placing the sentiment in different areas on each card, but I'm still not sure which I prefer.  
 

I layered the watercoloured panels onto Plum Pudding card and then onto Simply Chartreuse card, before adding them to the card blanks. I decided not to embellish them any further and to let the stamped images be the centre of attention. You can see that there is a difference in the stamping on each card, depending on whether I spritzed or brushed on the water - but I am happy with them both and will definitely use this technique again in the future.

It's my birthday today, so some of the family are taking us out for lunch to celebrate. As I plan to have a cheeky glass of wine I'm glad that I made these cards beforehand! Thanks for looking.

Sunday 6 April 2014

Cure For The Monday Blues # 11

This week's cure for the Monday Blues inspiration photo took me way out of my comfort zone.  http://littlemisst-papercraft.blogspot.com/2014/03/cure-for-monday-blues-challenge-11-and.html . In fact I had more or less decided not to enter this week until I received an email from Taheera and she reminded me about it - so I felt obliged to have a go! I thought that I would really struggle to come up with something, but in the end I had so many ideas that I actually made two cards today! 
 
 Source: Pinterest
 
 
My first card is a more feminine version, where I decided to concentrate on the right hand side of the inspiration photo . I started with a white 5" x 7" card blank and layered on some dotty pink designer paper from my stash and a smaller rectangle of Papertrey ink Spring Rain card. I used Memento Rich Cocoa ink and Papertrey Hibiscus Burst ink to stamp the Waltzingmouse Woodenheart Alphabet onto white card, substituting a small heart for the letter O. The panel was then layered onto a rectangle of Papertrey ink Dark Chocolate card and adhered to the card with double sided tape. I used the Hibiscus Burst ink again to stamp JustRite's "Autumn Damask Background stamp" (CL - 03895) onto white card and cut out a pennant shape. The Sweet Heart sentiment (from Waltzingmouse Stamps "Half Baked Gingerbread Joy" stamp set - as was the small heart) was stamped in Versamark and heat embossed with Wow Bark regular embossing powder and I added a small heart shaped pearl. The floral heart stamp was by Elusive Images (now Chocolate Baroque) and I used Versamark ink and Wow Opaque Bright White Super Fine embossing powder on some PTI Hibiscus Burst card, then cut it out and mounted it onto the card with foam pads.  I was very happy with the result.


For my second card I started with a black 5" x 7" card blank and layered on a piece of  yellow Core'dinations card from the Tim Holtz and Ranger Adirondack collection, then a layer of Papertrey ink Raspberry Fizz card, which I embossed with a Cuttlebug Swiss dots embossing folder. I used Memento Tuxedo Black dye ink to stamp the Elusive Images damask background (from plate UA4SP0156) onto white card, trimmed it and added the panel to my card with double sided tape. I used Versamark ink and the Wow white embossing powder again to stamp the "Smile" sentiment from Waltzingmouse Stamps' "Compact Sentiments" set onto turquoise card and one of the pretty bird images from Elusive Images' "Birds of a Feather" set (from plate UA4SP0218) onto another piece of the Raspberry Fizz card. I cut two of the smaller Spellbinders Labels One dies out of yellow and black card, layered them up and stamped the larger of the cameo ladies from Waltzingmouse Stamps' "Cameo Creations" using Raspberry Fizz ink. The panel with the bird was raised up on foam pads and the final touch was a row of three black gems in the bottom right corner.


This was the card that caused me the most problems as the colours were not what I'd usually go for at all - but I think that sometimes it's good to challenge yourself a bit more - it is called a "challenge" after all!  Thanks for looking!

Saturday 5 April 2014

Cupcake Inspirations Challenge 254

 
Earlier this week I discovered the delicious looking Cupcake Inspirations challenge blog here http://cupcakeinspirations.blogspot.co.uk/2014/03/challenge-254.html . Their sponsors this week are Core'dinations and I am a great fan of their colourful card so I decided to join in with this week's colour themed challenge. I have made two cards, both using 5" x 7" white card blanks and Core'dinations card.


For my first card I cut a panel of "Aruba" Core Color card and embossed it using a Darice Circle Background embossing folder and my cuttlebug machine. I used some lemon yellow card to die cut a panel for the sentiment using one of the Spellbinders Card Creator A2 Polka Dots dies (S5 - 133). The sentiment is from the JustRite "Seeds of Summer" clear stamp set (CR - 03755) and was stamped using one of Wendy Vecchi's new Archival ink colours, Forget-Me-Not, which is a lovely shade of turquoise blue. I then cut a white card panel with a Spellbinders Labels One die (S4 - 161)  and used Memento Tuxedo Black ink to stamp the pretty petunias image from the same "Seeds of Summer" JustRite stamp set. I coloured the petunias with Copic Ciao markers - Aqua Blue (BG01), Yellow (Y06) and Yellow Green (YG03). I used double sided tape to add the yellow panel to the card and foam pads to adhere the white flowery panel over the top. A row of three yellow pearls was the finishing touch.


For my second card I took two strips of Core'dinations in Aruba blue and a lemon yellow colour (which was from the Tim Holtz and Ranger Adirondack collection), and embossed them both with a Darice "Scroll with bird" long embossing folder in my Cuttlebug machine. These were adhered to the white card base with double sided tape, so that they joined in the centre to form one background panel. I cut two white card panels from the Spellbinders Deckled Rectangles large dies (S4 - 202) and used Memento Rich Cocoa ink to stamp "A Little Hug" by Leanne Ellis for Sugar Nellie and the "Thanks for being there"sentiment from the "Rescue Remedies Additions" stamp set by Waltzingmouse stamps. I coloured the image with Copic Ciao markers - Aqua Blue (BG01), Yellow (Y06), Chamois (E35), Skin White (E00) and Burnt Umber (E29). The two white panels were mounted onto the card using foam pads and the smaller one was embellished with a row of three tiny aqua coloured pearls.


I'd like to say a big Thank You to my good friend Lana, who gave me the Sugar Nellie stamp as part of my Christmas present last year!

Wednesday 2 April 2014

Friends are flowers ... JustRite Friday Challenge #117 - Sketch.

 
This week the challenge on the JustRite blog is a sketch http://justritestampers.typepad.com/justrite-inspiration/justrite-friday-challenge/ and Spellbinders have kindly sponsored the challenge.
 
 
JRSketch117
 
 
I have quite a few JustRite stamps and enjoyed selecting several different sets to use on my card, together with three Spellbinders dies. I started with a 5" x 7" white card blank and chose Papertrey Ink card in Aqua Mist, Ocean Tides and Sweet Blush. I used co-ordinating Papertrey inks too - Ocean Tides and Hibiscus Burst. I also found some wide faux wrinkled silk ribbon and six buttons from my stash.
 
 
Please click on the above photo to get an enlarged view.
 
 
I trimmed a rectangle of the Aqua Mist card to slightly smaller than the front of my card blank and used the Ocean Tides ink to stamp the Leafy Background stamp (SW 04555) onto it. I had to stamp the background twice, making sure that the join would be covered by the ribbon which I adhered with double sided tape. Next I die cut the Ocean Tides card using one of the Spellbinders Labels Eight dies (S5 - 190) and the Aqua Mist card was cut with one of the Spellbinders Decorative Labels Eight dies (S5 - 148). The decorative label shape was stamped firstly with the large frame from the Grand Sentiments stamp set (CR - 03885) and then with one of the sentiments from the Seeds of Summer stamp set (CR - 03755). The labels were stuck together using foam pads and added to the card with double sided tape.
 
I stamped the large flower from the Floral Vintage Labels Two stamp set (CL - 04455) twelve times onto Sweet Blush card using the Hibiscus Burst ink. These were then fussy cut out and decoupaged using foam pads, to make three large flower heads - each one was then topped with a pearly pink button. The foliage sprays were die cut from Ocean Tides card, with another Spellbinders die set (sorry I can't remember the name of it). I adhered the foliage sprays to the card with a small dab of Ranger's Glossy Accents and added the three flowers with double sided tape and foam pads. The photo below shows just how dimensional the flowers are - I will need to make a box for this card as I don't think it will fit into an envelope!
 
 
The final touch was added in the form of three pearly buttons to embellish the top left corner. The card is really pretty in real life and I really enjoyed making it. Thanks for looking!